
How To Use SlabSetters
Preparing to use SlabSetters
Prior to using SlabSetters for lifting, leveling, repositioning a Precast Concrete Sidewalk Slab or similar material, you should determine the best way to manipulate the slab. SlabSetters come in a set of four individual tools that can be used in different configurations to lift various styles, sizes, and shapes of slabs. The four tools allows each of two Operators to have one SlabSetters in each hand when lifting and moving a slab.
Regardless of the configuration used, a critically feature of the SlabSetters tool design is that the Operators will use the strength in their legs to lift the slab - not their backs. Also, SlabSetters will be lifting very heavy slabs with hard and potentially sharp edges. As such, adherence to both general personal safety practices as well as the SlabSetters documented safety instruction is strongly advised.
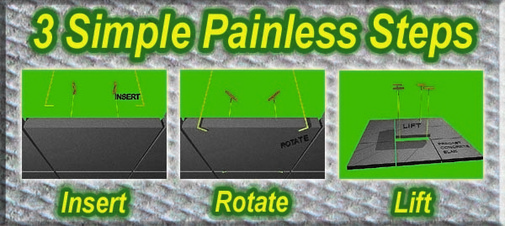
Once you have planned your project and understood all the safety instructions, it is time to install or re-level your slabs. SlabSetters are a very simple and flexible tool-set to use. Basically there are three simple yet fundamental steps to engage and use SlabSetters. The three steps are both illustrated and shown as a video animation.
Prior to using SlabSetters for lifting, leveling, repositioning a Precast Concrete Sidewalk Slab or similar material, you should determine the best way to manipulate the slab. SlabSetters come in a set of four individual tools that can be used in different configurations to lift various styles, sizes, and shapes of slabs. The four tools allows each of two Operators to have one SlabSetters in each hand when lifting and moving a slab.
Regardless of the configuration used, a critically feature of the SlabSetters tool design is that the Operators will use the strength in their legs to lift the slab - not their backs. Also, SlabSetters will be lifting very heavy slabs with hard and potentially sharp edges. As such, adherence to both general personal safety practices as well as the SlabSetters documented safety instruction is strongly advised.
Once you have planned your project and understood all the safety instructions, it is time to install or re-level your slabs. SlabSetters are a very simple and flexible tool-set to use. Basically there are three simple yet fundamental steps to engage and use SlabSetters. The three steps are both illustrated and shown as a video animation.
|
|
Below are additional details and tips about each step...
|
STEP 1 - INSERT hooks below slabs The first step in using SlabSetters to lift a sidewalk slab is to insert each of the four SlabSetters' hooks to a depth below the bottom edge of the slab being lifted. "Image Step 1 INSERT" illustrates how the hooks are in the process of being lowered through the gaps between the resting slabs in a patio layout. In order to accomplish the "Insert" step, each hook must be positioned parallel to the side edge of the slab where it is being inserted. This allows the hook to be inserted into the narrow space between the slab and its neighboring slab. Once each Operator positions her/his two SlabSetters' hooks properly beside the edges of the slab, they lower their respective SlabSetters' hooks downward into the narrow space between the two slabs until the hook of each SlabSetter is below the bottom surface of the slab being lifted. |
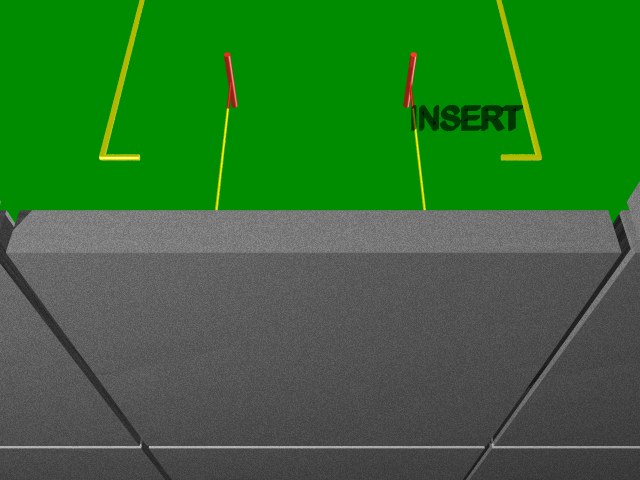
Step 1 - INSERT (click to enlarge)
|
|
STEP 2 - ROTATE hooks under slab Once the hooks have been successfully positioned below the bottom edge of the slab, the hooks of each SlabSetter must be placed into a full "SET" position. To set the hook for each SlabSetter, the Operators "Rotate" the handle of the SlabSetter in each of their hands by 90 degrees in a direction that forces the hook on the SlabSetter to rotate under slab and position perpendicular to the edge of the slab. The hooks are considered "SET" when each of the hooks are perpendicular to the side edge of the slab and the side edge of the slab is flush to the shaft of the each SlabSetter. The entire hook must be positioned under the slab to provide safe effective lifting of the Slab. |
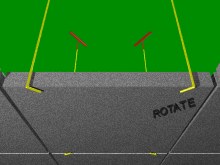
Step 2 - ROTATE (click to enlarge)
|
|
STEP 3 - LIFT slab with SlabSetters Once all of the SlabSetters' hooks are properly set under the slab being lifted, the Operators simply pull up on the handles of the SlabSetters in their hands. Both Operators should lift in unison (i.e. at the same time and at the same lifting pace) in order to provide a balanced lift and extraction of the slab from its resting location. As mentioned before, the pulling strength required to pull up on the SlabSetters should come from the Operators' legs. With their arm straight and back up-right and vertical - the Operators simply begin to straighten their legs from the originally bent-at-the-knees position. Once the slab has be raised high enough in elevation from its resting location (no more than 1" to 3" off the ground) the Operators can slowly swing out and poistion the slab to its desired new resting location. |
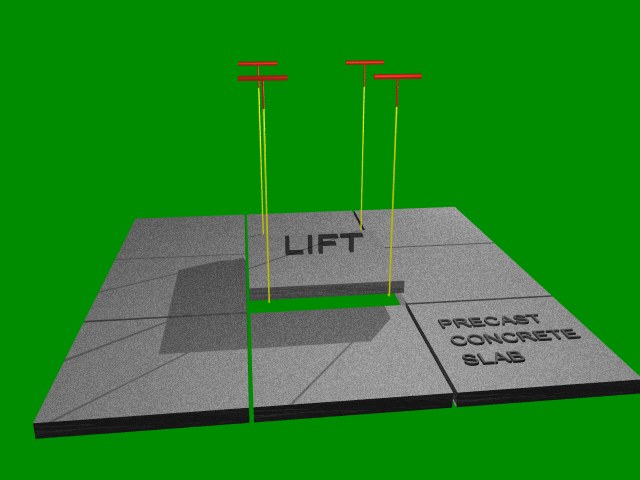
Step 3 - LIFT (click to enlarge)
|
Once the desired location and position of the slab has been found, the Operators simply reverse the three basic steps describe in this page (i.e. lower the slab, rotate the hooks to "unset" the hooks, remove the hooks from the slab edge).